Sunday, April 27, 2008

Giant Ant (Step 11) - you work 16hrs...

OK, so now the legs are really, really almost done!

This is a specially designed, adhesive backed stability strap used for high tech welding apparati, also know as 'masking tape'.

A quick inventory of parts and pieces for the ant head.


Here we are using a torch to cut out the shape for the ant hull, and boy, wouldn't a plasma cutter be great, right about now! Am I right??


A few last minute tweeks with the grinder.
fig. 1. Insert tab A into slot B.
...and voila!

Next we cut some old Coleman propane tanks to make the top leg appendage. Then a few patches to cover the holes up, and the ant body is looking pretty good.

And at the end of the day, we put the ant to sleep.


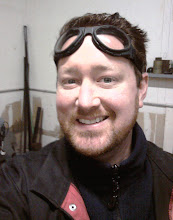
Here I am exercising just one of my many talents.

Sunday, April 20, 2008

Giant Ant (step 10) - making contact...

Welding lesson #1: do not stare into the light.
Now that the legs are done, it's time to see if this ant can stand.

We added a "pipe wedge" to thicken up the joints on the legs.


Me and my ant :)

It was such a relief to see that the ant could stand all on it's own.

Ron and Nate...the happy parents!


(giant ant...in case you forgot)

Wednesday, April 16, 2008

Giant Ant (step 9) - back in action


Getting ready for action...and....


...action!!!


You'd be surprised what you can do with a few thousand pounds of pressure - in my case, bend some ant legs into shape.


Look! A barrel full of ant legs! Yummmy.

Each leg is made up of three pieces of 1/2 inch re-bar, welded together, and inserted into 1 inch pipe.


Here the body is starting to take shape, but there will be more of that later.

Tuesday, April 15, 2008

Giant Ant (step 8) - more sketches

These are some ideas of how I'd like to make the body segments for the giant ant. This one is from the motorcycle fender. I had thought of cutting out notches in the metal to let me cinch it back together in a tighter arc. And then it would be welded onto the frame.

My other thought had been to get some large diameter pipe, cut it like we had with the legs, and re-assemble it to make the body segments.


These are the joints and base fixture sketches. The leg joints didn't quite end up this way, but the body/leg connector and the base connections should closely resemble the sketch.

Monday, April 14, 2008

Giant Ant (step 7) - construction day 3

It's good to lift with your knees, but better to lift with hydraulics!

We welded the frame right onto the lift so that we could maneuver the legs and body parts without straps, ropes, or clamps getting in the way.


Every project needs legs to get off the ground, and a giant ant is no different.

First the re-bar legs were welded inside steel piping. Then we measured the angle of each joint and cut the pipe to match. And finally we re-attach the halves and weld them back together.


Six legs per ant. No more, no less.


And after several counts, we were sure.

Almost ready to stand on it's own!


The end?

Giant Ant (step 6) - construction days 1 & 2

Does anyone recognize these?

It's just like a toy model you had as a kid, except the instructions are mostly guess work, the glue is hot, molten metal, and if you drop the pieces they could crush your foot. Where's the danger in that??

Now that's a big print out! Thanks so much Seth!

I don't think ants usually have a backbone...but this one sure as hell does!

aaaah, perspective : )

Oh yeah, this thing is going to get heavy! The wheel rims may be a great shape, but they're gonna add some major lbs to the back end...how are we going to counter that?


Oh, who cares...this thing is looking really cool!!!


Yeah, something like that.


(just in case you wanted a closer look)


My baby's first step!

Giant Ant (step 5) - tools of the trade

A grinder is a sculptor's best friend. I can't even count how many grinding wheels I've gone through on this project. But as long as the sparks continue to fly, I'm happy.


This band saw is a machine that cuts through just about everything! And believe me, we put just about everything through it.

And Ron Durand is the man who tells it what to cut!

This torch gets kinda warm...you know, like a great white gets kinda frisky. But it can't be beat when it comes to bending re-bar!

Giant Ant (step 4) - the hunt begins!

"It truly takes a colony to raise an ant"
-ancient walker proverb


There's nothing like scavenging for ant parts in a big pile of rusty metal. But I have to say, the Portsmouth Trading scrap metal co. is the holy grail for metal oddities and funkiness! I found most of my supplies there, and they gave me a great deal on the price, being that I was an artist.


These old tire rims were a great find - they were the perfect shape for an ant abdomen!


Cycles 128 in Beverly had a great assortment of used motorcycle parts. And like the tires, these pieces seem to have a purpose beyond their original intention. It must be their alien-yet-organic forms which scream out - "bug parts!"

And tell me, if this gas tank isn't the absolute perfect ant head!


Packing up the old pick-up for transport...I'm not sure which is the junk metal here? But at least it still runs!


Cutting and grinding away on the rims revealed this beautifully polished shape!